Thursday, December 8, 2011

Lemon Cake

Pin It

One thing I am never tired of is baking cakes. Even if it had been a hectic day, the thought of taking out my measuring cups, pans, blender, etc., and most importantly searcing the web for a new recipe always seems to invigorate me.

I don't have to mention the aroma that fills the entire house when the cake is getting ready.


Though I would love to bake more often I try to limit myself to not more than twice a month as it is always me who end up gulping down major portion of the cake. My husband has become more watchful of what goes inside his tummy and my kid, after his first piece, simply gets distracted and forgets about it.

So whenever I enter the kitchen the cake starts yelling at me (especially if it has plenty of icing on it) to take just a small bite. Eventually after many small bites and when the cake has become considerably smaller in size, the kid suddenly remembers about it. By then the major chunk is happily resting inside my tummy. Ha...ha...ha...not my fault, he should have been more alert. Anyway he is not very fond of cakes with plenty of frosting. So he dosen't mind. Good for me.

Last week I made this cake. The recipe is from here. For the frosting I used the Italian Meringue Frosting that you can find here. Do I have to say that it was delicious? If not, I wouldn't have bothered to photograph it and post it here.


Try it and you will enjoy it.

Have a nice day.

Saturday, December 3, 2011

Crochet christmas tree

Pin It

Hi everybody, and a special "hi" to all my new friends. Happy to see you all here.  You all make me feel great. Thanks for all the lovely comments you leave here.

I guess all of you have started your Christmas preparations. I haven't got into the Christmas mood yet, or rather I should say I lost it in between. I had planned so many things. I wanted to do this, I wanted to do that...but somehow I got bogged down by other things and now I lost the mood. I am trying very hard to get my mojo back. 


This Christmas tree is one successful thing I completed out of many that I had planned.  The pattern for this tree is from here. There were also other Christmass tree patterns that I wanted to try... may be for next Christmas.


That's it for now ladies. Have a great weekend.

My Crochet Christmas tree pattern is available here


Friday, November 25, 2011

Crochet chocolate cake

Pin It


I guess all my American friends had a wonderful Thanksgiving Day, and of course, we are all looking forward to a wonderful weekend as well.


I had been waiting to show you this yummy chocolate cake that I crocheted some time ago, but somehow it got delayed for one reason or the other, and finally it is here.


This is one of my favourites so far. It looks ohhhh soooo delicious that I had to resist myself from taking a bite. I am using this as my pincushion now and it is here next to my computer, and I am looking at it longingly now and then.


I used styrofoam to stuff this cake. It's real fun to make and I am sure you will see here more cakes and other yummy treats too.

Have a nice day.


Sunday, November 20, 2011

Salt dough Christmas ornaments

Pin It

Hello everybody, how did your weekend go? Mine was sort of mixed. Little fun, lot of work, little unwell, some travel...now I am waiting to hit the bed and have a good night sleep, but not before making this post.

But first, thank you all for stopping by and leaving your sweet comments here. Also, a warm welcome to all my new friends. I am very pleased to have you all here.


Most of you must have started your Christmas preparations by now. I came across a fun project in the internet to make some interesting tree decorations and would like to share it with you.

I would say this is one of the most inexpensive form of crafts since you are only going to use things that are available in your kitchen.

Yes... all you need is flour, salt and little water. And, some paint and sequins to decorate your ornaments.


Take a cup of flour and add half a cup of salt to it. Mix well and add enough water to make a pliable dough. Shape them into desired shapes. If you have a cookie cutter it makes your work easy. I don't have these shapes, so I had to draw them out on flattened dough and cut using a knife.

Note, this is NOT edible. Your children might be tempted to take a bite.


Once you have shaped them bake in an oven at a low temperature for a long time. I baked at less than 100 degree C for about 1 hour. Don't let them brown. You can even dry them in the sun, but that would take ages and I don't think anyone would have so much patience.


You know they are done when they sound hollow when you tap them. When they are ready you can paint them and decorate as you wish.

Oh, don't forget to make those holes while shaping your dough if you are planning to hang them.

Aren't they cute?


Be careful while handing them. Make them a little thick because if they are too thin they tend to break easily.

Go ahead and have fun making these ornaments!

Monday, November 14, 2011

Shortbread

Pin It

If you ask me which is the easiest and the tastiest cookies of all, without second thought I would say it is the shortbread. I have made shortbreads a number of times and not even a single time was I disappointed.

 I ♥ its crumbly texture, buttery flavour and the mild sweetness.


Also, it requires very less ingredients. For the traditional shortbread recipe you need only flour, butter and sugar, but for variation you can also add flavours of your choice.


Here is the recipe


Have a nice day.

Saturday, November 5, 2011

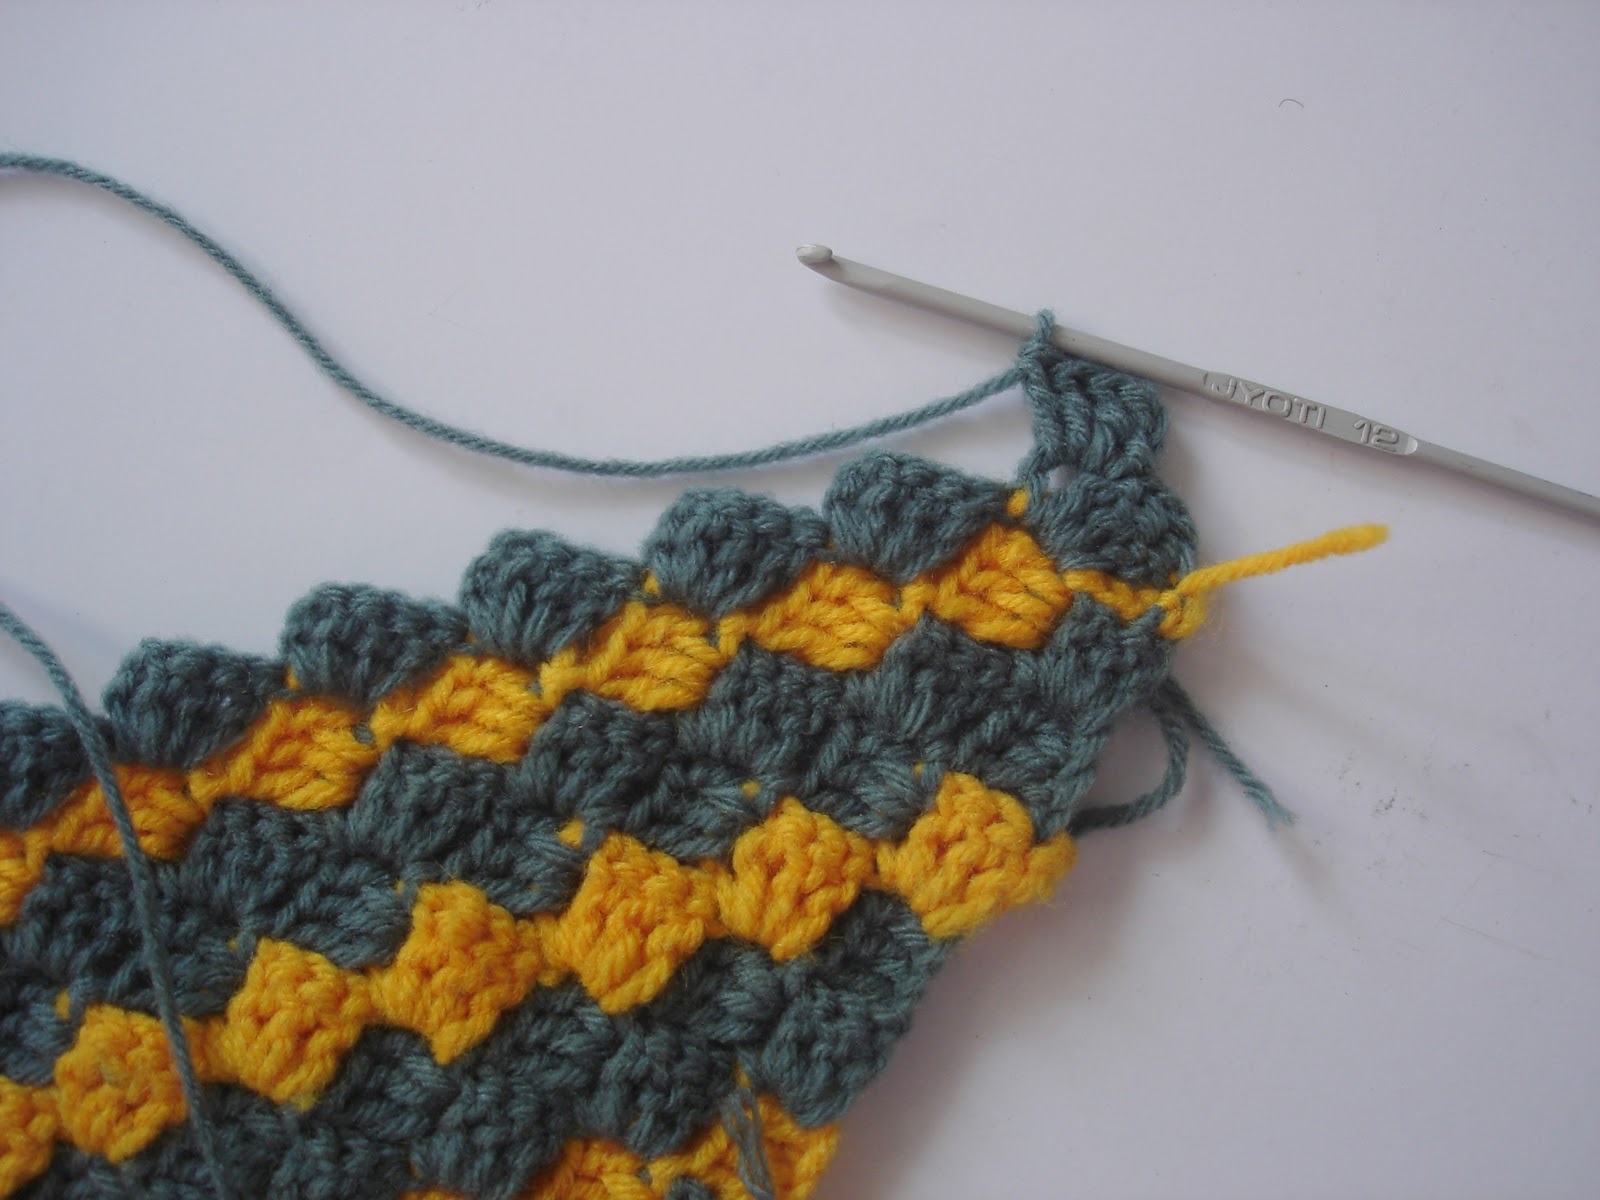
How to crochet diagonally - Crochet diagonal box stitch tutorial

Pin It

Hi everyone, looking ahead to a wonderful weekend? My weekends are not so very interesting. It is just like any other day except that I have more work on weekends :-)

This is the stool cover that I showed you earlier. It is done and I am very pleased.


This stitch was a little confusing at the start and I even considered making a simple and easy granny instead, but I didn't want to give up so easily. So I tried and tried (oh... not so many times, it is not that difficult) and after the first couple of rows the hook started to glide along smoothly. 


I felt like sharing what I learnt with you all and so made this tutorial. I would like to warn though that this MAY NOT BE suitable for a beginner. It may appear a little confusing initially, but, of course, anything can be mastered with a little practice.

I have tried to explain as best as possible through these photos, so please pay attention to the details in the photos.

Shall we start?

1. Make 6 chains.


2.  Double crochet (dc) into the 4th, 5th and 6th chains from the hook.


Your first row is done. If you wish to change colours you can do so at the beginning of a new row.

3.  Chain 6.


4. Make double crochet (dc) into the 4th, 5th and 6th chains from the hook.


5. Look at the set of photos below. As shown in the first photo take the hook to the place where I have marked the arrow head (that would be your first 3 chains from the hook of the basic chains that you made) and make a slip stitch.


6. Make 3 ch.


7. Make 3 dc in the same space. Your 2nd row is finished.


8. If you are joining a new colour do it and make 6 ch.


9. Make dc into 4th, 5th and 6th ch from hook as in step 2 and slip stitch as shown.


10. Make 3 ch.


11.  Make 3 dc into the 3 ch space as you did in step 7.


12. Join with slip stitch to the 3-ch space in the next box as shown below.


13.  Make 3 chains and 3 dc into the same space.


This is how you will be progressing and increasing the size of the pattern. Continue until you have reached the desired length.


In the above photo you can see that I have reached the desired length at the top left corner but have to increase more in the bottom right corner. So I have to stop increasing on one side and continue to increase on the other side. If you are working a square, then you can start decreasing both the sides simultaneously but since this is a rectangular piece I can't do that.

Now I will start decreasing on one side.

Start decreasing


If you are joining a new colour, do so. I usually make a knot so that they are more strong, but you can follow any method of joining a new colour.

A. Make 3 chains (for increasing a row you make 6 chains)


B.  Turn and make a slip stitch into the 3-ch space.


C. Make 3 ch.


D. Make 3 dc into the same space.


E. Continue until the end of the row as usual.


F. If you are making a rectangular piece then start the next row with 6 ch and continue increasing the length, (you are going to decrease only on one side and increase on the other side for a rectangular piece), but if you are making a square piece then make 3 ch and follow the steps from A because you have to decrease on both side simultaneously.

You can see in the below photo that I have increased this side of the row and continued to work until teh end of the row.


G. When you have reached the end of the row you would have made 3 dc into the last box of the previous row. Now make a slip stitch to the 3-ch space as shown below.


H. Make 3 ch.


I. Slip stitch into the next 3-ch space.


J. Make 3 chains and 3 dc into the same space.


Continue working in this manner. In the below picture you can see the side where I have stopped increasing has started to level off.


Since I have reached the required length on the other side of the stool too I have to now stop increasing and start decreasing on both the sides.


So for decreasing on the other side also follow the steps from A and continue until the end.

Oh phew! I am exhausted.

I hope my tutorial is clear enough. Go ahead, take the plunge and do a blanket, a pillow cover, shawl, whatever... or even a dishcloth might be an excellent idea to test this new stitch.  


Have a nice weekend.
Related Posts Plugin for WordPress, Blogger...