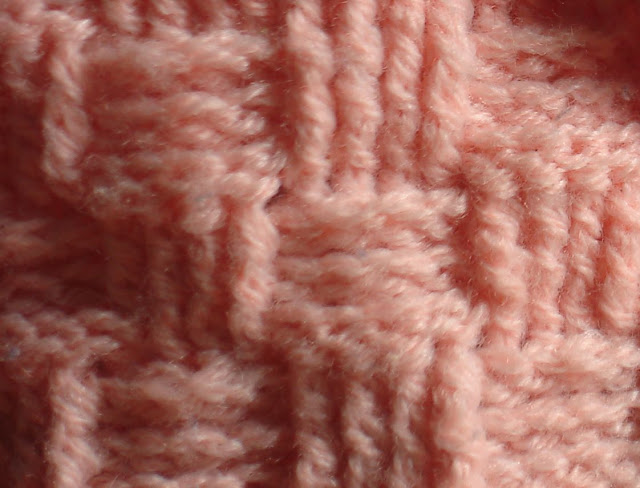
The basket weave pattern consists of horizontal and vertical blocks. You can vary the number of stitches in each block. I have made each block 4 stitches across and 3 rows deep (it appears to have 4 vertical lines and 3 horizontal lines). Like me I know many of you might be quite apprehensive to try this pattern initially. But it is not at all as complicated as it appears to be. Normally we work on the top of a stitch but in this pattern we are going to work around the stitch. We call each stitch a post.
We work around the post by inserting the hook from back to front and front to back to produce the horizontal and vertical patterns. I have tried to explain it as best as I could through these pictures.
First to make the vertical blocks.
1. Wind the yarn around the hook.
2. Insert the hook between the first and second posts from front to back.
3. Wind yarn around the hook and draw the yarn through.
4. Now you have three loops on the hook.
5. Wind yarn around hook and draw through the first two loops and you have two loops on the hook now.
6. Draw the yarn through the remaining two loops and you have made one stitch.
7. Make three more stitches and you have the first row of a vertical block.
Now for the horizontal block
1. Wind yarn around the hook.
2. Take the hook behind the fabric.
3. Insert hook from back to front between the posts.
4. Take the hook around the post to the back of the fabric.

5. Wind yarn around the hook and draw it through the posts.
6. Now you have three loops on the hook. Yarn around hook and draw through two loops.
7. Again draw through the remaining two loops.
8. Now you have made one horizontal stitch.
9. Make three more stitches and you have the first row of the horizontal block.
While doing the bag, continue working in the above-mentioned manner till the end of the row. Make two more rows to form alternating vertical and horizontal blocks. For the fourth row you have to reverse the sequence, i.e., form vertical blocks at the top of the horizontal blocks and horizontal blocks at the top of the vertical blocks. This way you form a basket weave pattern.
I hope the instructions were clear enough.
I hope the instructions were clear enough.


Hi Pradeepa,
ReplyDeleteyou have a nice blog. Just today, I taught my student about front and back post. Your post has some good pictures I can show her.
Happy blogging
Hi Bhavani,
ReplyDeleteThanks for visiting. Happy to hear that my blog is being useful. Please do visit again.
Hi Pradeepa,
ReplyDeleteyour blog is so nice and the instructions given is very useful.I love your basket weave bag.I want to give a try .Thanks for sharing.
Uma
http://umacheenu.blogspot.com
Hi Uma,
ReplyDeleteThanks for your comment. Please try and let me know how the bag turns out. Thank you so much for joining my blog.
Hi,
ReplyDeleteon the picture which comes after the line "First to make the vertical blocks." you already have 2 loops on the hook (and also throwing the yarn over). Can you please explain how did you get to having those 2 loops first. Thank you!
Deena
Hi Deena,
ReplyDeleteSorry to have confused you. If you notice the picture you can see that I had already made a stitch and it was the next one that I was showing. So that loop was from the previous stitch. I hope that explains it. If you need any more clarification please let me know.
Thank you for your answer, and I have one more question :)
ReplyDeleteWhen starting the first vertical block, do you chain 1 or 2 for the turning chain or you just go after you have finished previous round and turned your work? Thank you!
For the bag you are not going to turn your work, you will just be working in rounds. At the end of a round you will be joining the last stitch to the stitch at the beginning of the round. Then you can make 1 chain and continue with the next round.
ReplyDeletewow!! what a pretty pattern!:)
ReplyDeleteHi,,thanks for giving all the lil details,,so inspiring,,can't wait to try it,,
ReplyDeleteMUCHAS GRACIAS POR AYUDARNOS YO LO APLIQUE EN UN GORRITO PRONTO LO COMPARTIRE EN MI BLOG :D:3
ReplyDelete